
Getting set up properly for doing a digital takeoff is the key to success.
When taking your steel erection takeoff digital, the most important step is to get set up with the right system and the right monitors. This will truly determine your success when making the transition to doing digital takeoffs. If you do not get this right you will find yourself frustrated especially when it comes to monitors.
Type Of Computer Needed
When it comes to computers, each type of takeoff software will have a set of requirements IE…
- CPU: Core i5 or equivalent or greater. …
- Memory: 4GB minimum. … (I would recommend 16GB for better performance)
- Disk Storage: 500GB minimum, 1TB+ recommended.
- Video Card: 32-bit color required.
- Video card with 2mb-4mb highly recommended.
If you have a PC that matches the above or higher you could run any takeoff software. If you are a mac user keep in mind that most of the takeoff software are PC based so to run them on a Mac you would need to use Bootcamp or Parallels.
Myself, I use a Surface Pro 4 with Intel Core i7 – 16GB Memory – 512GB Solid State Drive. I use a docking station which allows me to project it to 2 monitors. On my Surface Pro 4 I have all these software’s loaded on it. eTakeoff, Onscreen Takeoff, Planswift, Bluebeam, Tekla and Fabsuite what I like most about the Surface Pro 4 is the portability of it and can take it any where I go which allows me to work from any where.
By no means am I saying you need a Surface Pro 4 to do a digital takeoff, any PC will work that meets the requirements, I just mentioned the Surface Pro 4 as I find it to be a great machine and have used one for over 4 years, will note that I’m on my second one.
Type Of Monitor Needed
This by far is the most important thing to get right when taking your takeoff digital. I started doing digital takeoffs in 2001, back then you were hard pressed to find a large monitor, it is much easier today and the prices have come down substantially. You want a large monitor so that you can see the full plan with out having to pan around so much. When I first started I had the fear of not being able to see the full plan like I could on the plan table. Today with the large monitors that are available that is no longer an issue.
TV or a Computer monitor? Yes, TV’s can be cheaper but what you want to keep in mind is you want the blueprint text to be crisp and clear, myself I found that with a TV you do not get the crisp clear text that you can on a very high resolution monitor. And the key for clear, crisp text is the resolution of the monitor.
As far as size the larger the better. I would go no smaller then a 27″ with a 30″ to 34″ being Optimal
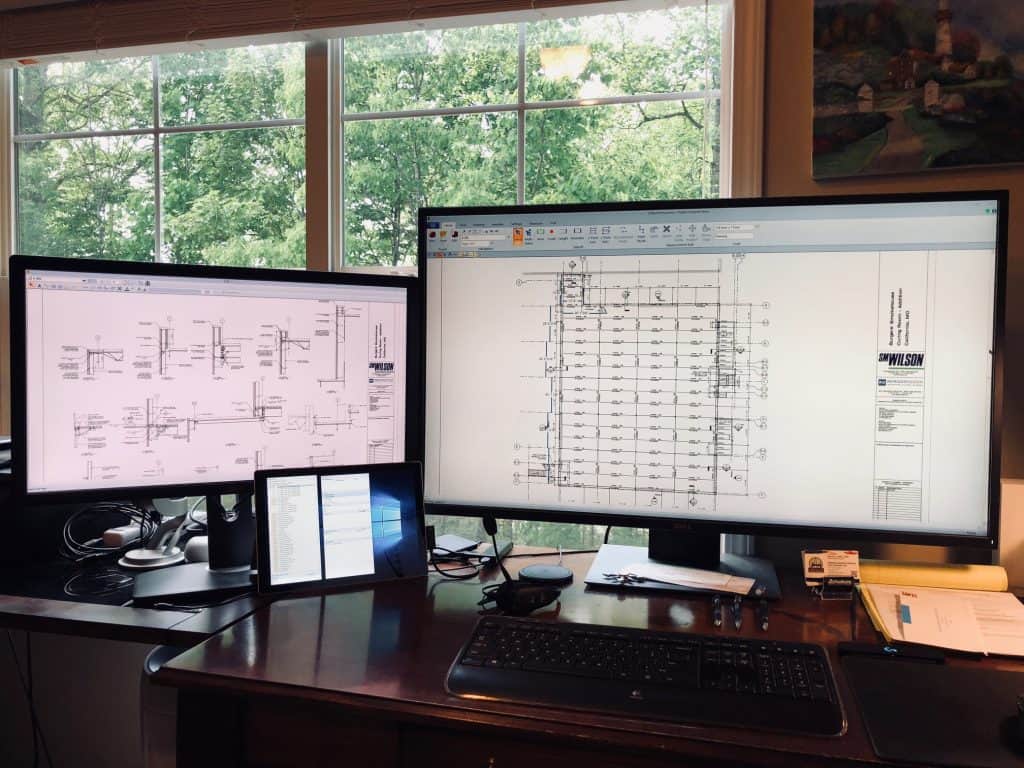
You will need two monitors. One monitor will be for the plans you are doing the takeoff on and the other monitor will be for the detail pages, the monitors are set up side by side so you will be just looking left to right.
Myself I use a 43″ Dell for my main plans and a 27″ Dell for my detail plans it works great for me.
Here is a picture of my set up.
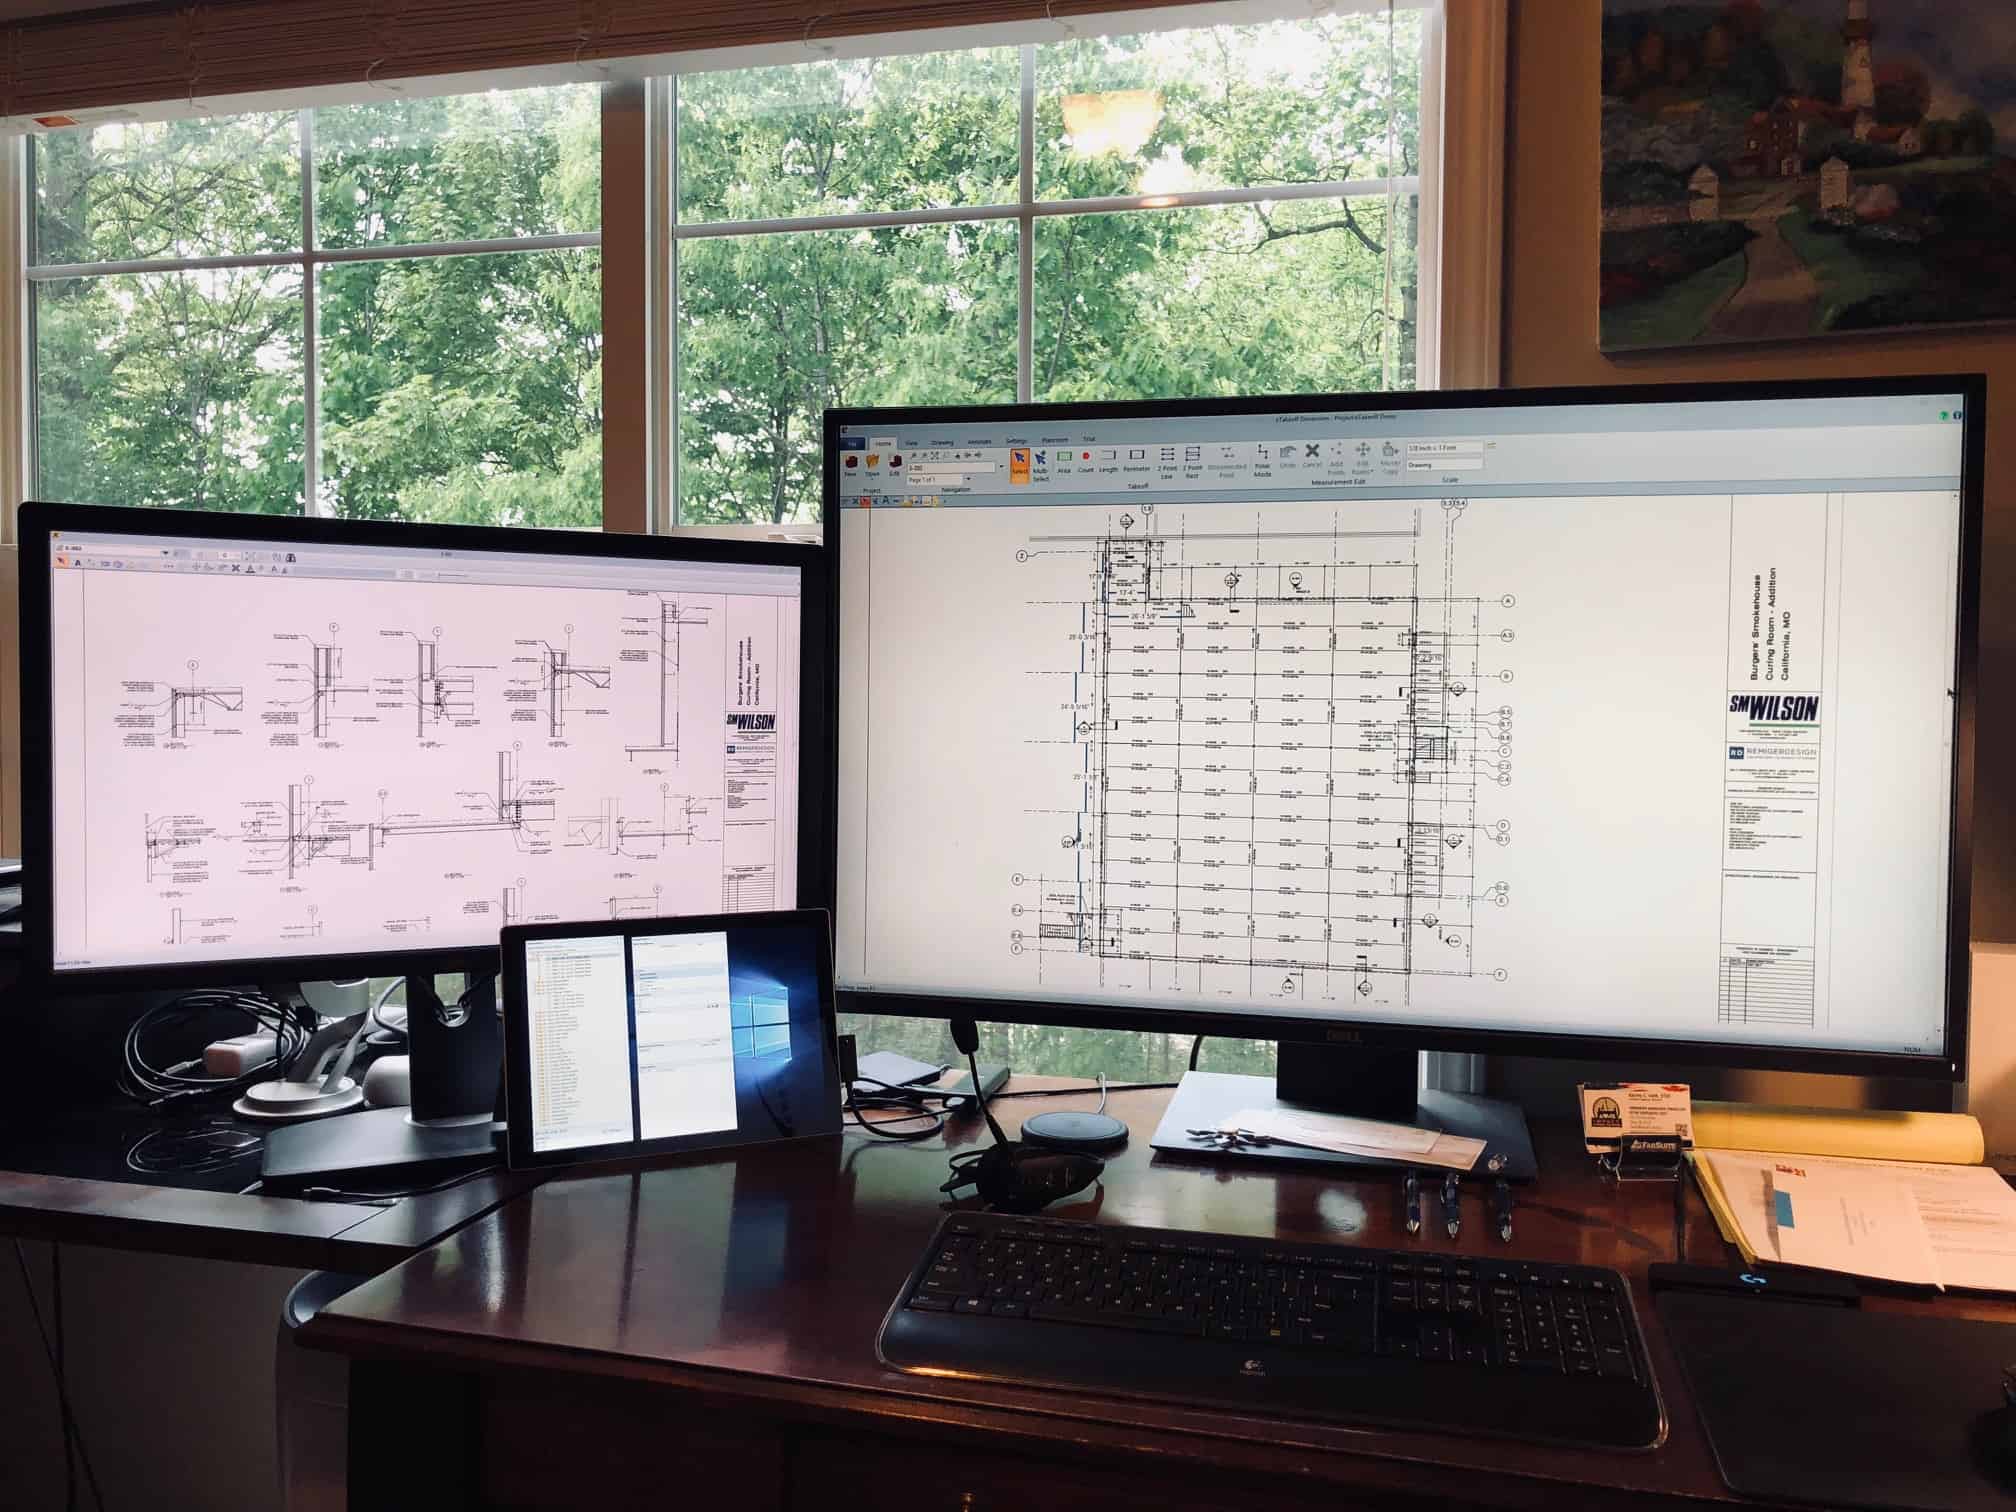
There are many types of monitors on the market the main thing I think is just to make sure you get the highest resolution as you can for example on my 43″ monitor the resolution is 3840 x 2160 (DisplayPort: 60 Hz, Mini DisplayPort: 60 Hz, HDMI: 30 Hz)
You may want to do some experimenting with different monitors as well as 4K TV’s in the past I actually took my Surface Pro 4 into the store and plugged it into several different TV’s to see how the plans worked on it. I should note I have never tried it on a 4K TV so it may be that it works just fine.
Whats important to note is you want the plan as clear and crisp as possible, as you will be looking at it all day plus the clearer it is the less you will have to zoom in which allows you to see more of the project you are working on.
Optional Tool
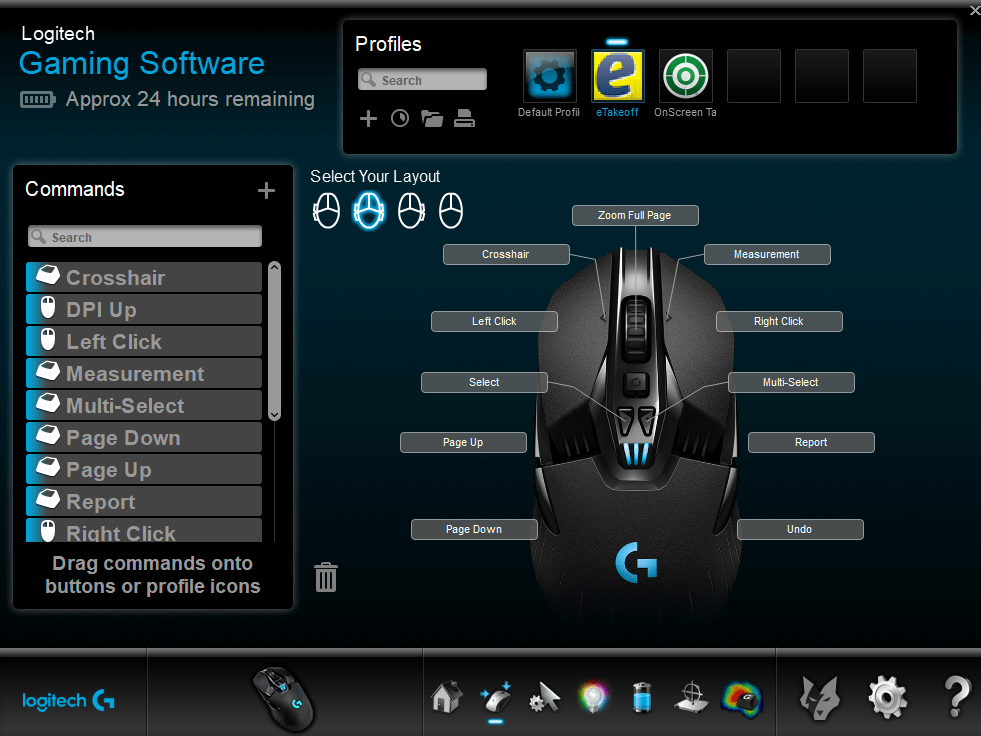
I just wanted to mention this as well, as it can be a real time saver. I use a logitech G 903 gaming mouse it has 11 programmable buttons which is awesome for doing an erection takeoff as it allows me to control everything from my mouse for the most part. Here is an image of the mapping to give you and idea how I use it. The benefit I find in using it is, instead of going to the navigation bar and clicking the function or hitting a hot key on keyboard I can perform the desired functions all on my mouse.
As always if you have any questions give me a call at 505-249-2390
Next Up. “Setting up project folders and uploading plans.”
Steel Estimating Solutions
Vince Hughes
505-249-2390
steelerectionbidwizard@gmail.com
PS… If you are looking to take your estimating process into the 21st century, Steel Estimating Solutions can be a great resource to help you make that happen. I have been doing digital takeoffs since 2001 and have developed a pricing tool (actually, much more than that) called the Steel Erection Bid Wizard. I have helped over 260 Steel Erectors to make the transition and would love to help you as well. Give me a call anytime.
Steel Erection Bid Wizard
Join dozens of your peers that have revolutionized the way they estimate. Take your estimating department digital with Steel Erection Bid Wizard. Only software on the market made for Erectors by an Erector.
Steel Erection Bid Wizard is a fully functional Windows – based software package. Estimate your bids more quickly and easier than ever before.
Benefits of The Steel Erection Bid Wizard
- Reduce the time it takes to estimate by 50% or more
- Tried & true production rates for labor, crane & weld time
- You can easily adjust production rates to fit your company
- More than 300 built-in tasks
- Ability to create your own tasks and add new categories
- Generate one-touch proposals
- Integrate with multiple takeoff software’s
- Peace of mind
- Smart Fuel Calculator
- Weather Projections